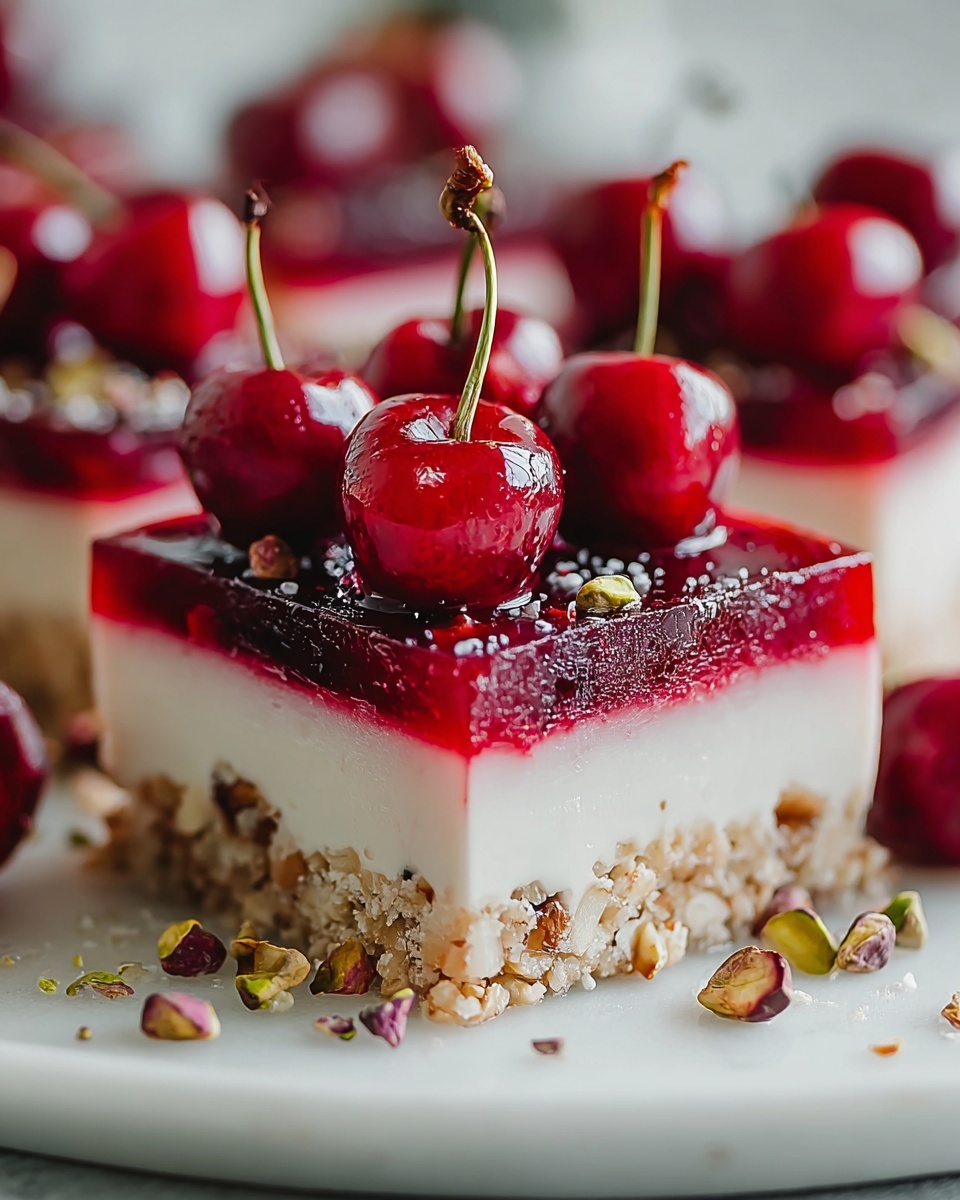
If you think cheesecakes always need to be baked in a springform pan with delicate swirls of fruit on top, wait until you try this twist on a classic dessert. The Heavenly Cherry Pistachio Cheesecake Bars Recipe brings together a lush, creamy cheesecake base layered with vibrant cherry compote and crunchy pistachios, all enveloped in a luscious crust that’s bursting with flavor. Every bite feels like a celebration, perfectly balancing sweetness, tang, and texture. Whether you’re treating yourself or impressing friends, these bars are downright irresistible.

Ingredients You’ll Need
This recipe shines because of its straightforward, wholesome ingredients. Each element plays a vital role in creating that perfect harmony of texture and taste—from the creamy cheesecake to the jewel-like cherries and the satisfying crunch of pistachios.
- Cream cheese: The creamy foundation that makes the bars rich and smooth.
- Sour cream: Adds tang and lightness to the cheesecake batter.
- Granulated sugar: Sweetens the filling just right without overpowering.
- Vanilla extract: Enhances the overall flavor with a warm sweetness.
- All-purpose flour: Used to thicken the cheesecake filling for a perfect set.
- Cherry pie filling or fresh cherries: Brings vibrant, juicy bursts of flavor and a lovely red hue.
- Chopped pistachios: For that delightful crunch and nutty aroma that complements the cherries beautifully.
- Butter: Forms the buttery crust, binding everything deliciously together.
- Graham cracker crumbs or digestive biscuits: The base layer with a hint of sweetness and a crisp bite.
How to Make Heavenly Cherry Pistachio Cheesecake Bars Recipe
Step 1: Prepare the Crust
Start by preheating your oven and preparing your pan. Combine your graham cracker crumbs with melted butter until the mixture resembles wet sand. Press it firmly and evenly into the base of a lined baking dish. This buttery crust is the perfect sturdy base that holds all the creamy, fruity layers above.
Step 2: Mix the Cheesecake Batter
In a large bowl, beat together cream cheese and sugar until fluffy and smooth. Add sour cream, vanilla extract, and flour, mixing just until combined. The batter should be silky and slightly thick—a perfect canvas for the cherries and pistachios to shine.
Step 3: Layer the Cherry and Pistachio Additions
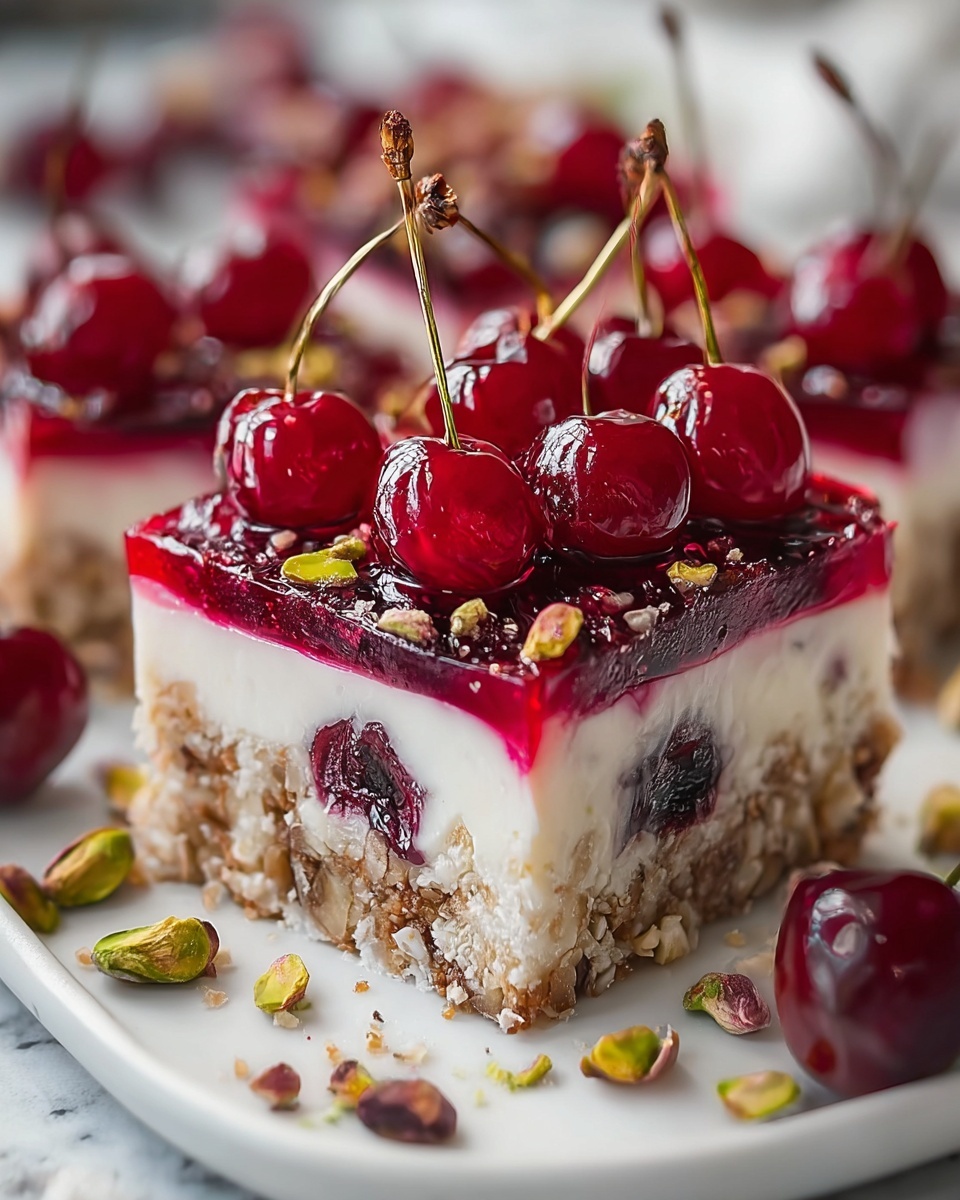
Pour half of the cheesecake batter over the crust, then dollop cherry pie filling evenly on top. Sprinkle a generous handful of chopped pistachios to add that irresistible crunch. Repeat with the remaining batter and cherries, finishing with a sprinkle of pistachios for a visually stunning look and textural contrast.
Step 4: Bake to Perfection
Pop the pan into the oven and bake until the cheesecake is set but still slightly jiggly in the center—about 30 to 35 minutes. This careful baking ensures a creamy, luscious texture without cracking or dryness. Once out of the oven, allow it to cool completely before chilling in the refrigerator for several hours or overnight to let those flavors meld.
Step 5: Slice and Enjoy
Once fully chilled, lift the entire cheesecake slab from the pan using the parchment, and slice into generous bars. The combination of smooth, tangy cheesecake, sweet cherries, and nutty pistachios in every bite is simply heavenly.
How to Serve Heavenly Cherry Pistachio Cheesecake Bars Recipe
Garnishes
To really elevate these bars, top with a few extra pistachios or a sprinkle of fresh cherries just before serving. A dollop of whipped cream or a light drizzle of white chocolate can add that extra touch of decadence if you’re feeling fancy.
Side Dishes
These bars pair beautifully with a light cup of espresso or a refreshing herbal tea to balance the richness. For a brunch spread, serve alongside fresh fruit or lightly toasted nuts for additional texture and flavor contrasts.
Creative Ways to Present
For special occasions, plate a cheesecake bar with a delicate cherry coulis swirl or individually portioned into mini jars layered with whipped cream and pistachio crumbs. Alternatively, pop them on a dessert board with complementary pastries and fresh berries for an eye-catching centerpiece.
Make Ahead and Storage
Storing Leftovers
Keep your leftover cheesecake bars covered tightly in the fridge for up to 5 days. This helps maintain their moisture and keep the pistachios crisp. Make sure to use an airtight container or wrap them well to prevent absorption of any fridge odors.
Freezing
Want to save some bars for later? Wrap each piece individually in plastic wrap, then place in a freezer-safe bag or container. They freeze beautifully for up to 2 months—just thaw overnight in the fridge before serving for best texture and flavor.
Reheating
Cheesecake bars are best enjoyed chilled, so reheating isn’t typically recommended. If you prefer them slightly softened, let the slices sit at room temperature for about 15 minutes before eating. Avoid microwave heating which can make the texture grainy.
FAQs
Can I use fresh cherries instead of pie filling?
Absolutely! Fresh or frozen cherries can be cooked down with a bit of sugar and lemon juice to create a natural compote that works wonderfully in this recipe.
Are these bars gluten-free?
Not as written, since graham crackers contain gluten. However, you can substitute with gluten-free graham crumbs or almond flour to make them suitable for gluten-free diets.
Can I substitute pistachios with another nut?
Yes, walnuts or almonds can also add great crunch and flavor, but pistachios remain the classic pairing for that signature sweet and slightly savory contrast.
How long do the cheesecake bars need to chill?
Ideally, chill for at least 4 hours or, better yet, overnight. This helps the cheesecake set beautifully and the flavors to blend perfectly.
Can I make these bars vegan?
With thoughtful substitutions like vegan cream cheese and dairy-free sour cream, plus a plant-based crust alternative, you can create a delicious vegan version of this recipe.
Final Thoughts
Making the Heavenly Cherry Pistachio Cheesecake Bars Recipe is like creating a little slice of joy that you get to share and savor any day of the week. With its perfect balance of creamy, sweet, tart, and crunchy, it will easily become a beloved staple in your dessert rotation. Trust me, once you’ve tried these bars, they’ll be the first thing you reach for whenever you want to treat yourself or impress guests with something truly special.
Print
Heavenly Cherry Pistachio Cheesecake Bars Recipe
- Prep Time: 15 minutes
- Cook Time: 30 minutes
- Total Time: 45 minutes
- Yield: 4 servings
- Category: Main Course
- Method: Grilling
- Cuisine: American
Description
These hearty and flavorful Cheeseburger Foil Packets combine seasoned ground beef, tender Yukon gold potatoes, onions, and tangy dill pickles, all wrapped in foil and cooked to perfection either on the grill or in the oven. Melting cheddar cheese over the top adds a creamy finish, making these packets an easy, delicious, and satisfying meal perfect for outdoor grilling or a quick oven bake.
Ingredients
Meat Mixture
- 1 lb ground beef (80/20)
- 2 tbsp Worcestershire sauce
- 1 tsp garlic powder
- 1 tsp onion powder
- 1 tsp smoked paprika
- 1/2 tsp salt
- 1/4 tsp black pepper
- 1/4 cup dill pickle slices
Vegetables
- 4 medium Yukon gold potatoes, thinly sliced
- 1 medium yellow onion, sliced
Other Ingredients
- 1 cup shredded cheddar cheese
- 2 tbsp olive oil
- 4 tbsp ketchup (optional, for serving)
Instructions
- Preheat Grill or Oven: Preheat your grill to medium-high heat (around 400°F/200°C) or your oven to 400°F (200°C). Prepare four 12×12-inch sheets of heavy-duty aluminum foil to make individual foil packets.
- Prepare Beef Mixture: In a large bowl, combine the ground beef with Worcestershire sauce, garlic powder, onion powder, smoked paprika, salt, and black pepper. Mix thoroughly until all the ingredients are evenly incorporated.
- Toss Potatoes and Onions: In a separate bowl, toss the thinly sliced Yukon gold potatoes and yellow onion slices with the olive oil, making sure they are well coated to ensure even cooking and flavor.
- Assemble Foil Packets: Evenly divide the potato and onion mixture among the four foil sheets, placing it in the center. On top of this bed of veggies, add the seasoned ground beef in a loose patty shape. Then, place the dill pickle slices on top of the beef for added tang and crunch.
- Seal the Packets: Fold the foil over the ingredients and seal tightly, creating packets to lock in moisture and flavors during cooking. Place the foil packets on the preheated grill or on a baking sheet if using the oven.
- Cook the Packets: Grill or bake for 25-30 minutes, or until the beef reaches an internal temperature of 160°F (71°C) and the potatoes are tender when pierced with a fork.
- Add Cheese and Melt: Carefully open each foil packet and sprinkle the shredded cheddar cheese over the cooked beef and potatoes. Reseal the packets for 2-3 minutes to allow the cheese to melt thoroughly.
- Serve: Carefully open the packets again and serve hot, accompanied by ketchup if desired for dipping or drizzling.
Notes
- Use heavy-duty aluminum foil to prevent tearing during cooking and retain steam inside the packets.
- Adjust seasoning to taste if you prefer more or less spice.
- The packets can be prepared ahead and stored in the refrigerator; add cheese just before reheating or serving.
- These foil packets are perfect for meal prep, camping, or outdoor grilling.
- Ensure ground beef is cooked thoroughly to 160°F (71°C) for food safety.
